There were a couple of considerations:
1. It was going to be useful for only a short period of time before he outgrew it.
2. It had to stand up to hammering and nailing, most likely at some point directly into the bench so I had to be sturdy, and cheap so I wouldn't care that it got banged up
3. His woodworking needs are limited, including probably no planing at this point
4. It had to be out of materials I had on hand.
So, I settled on a bunch of 2x6 and 2x4 lumber I had sitting around my shop for years and which were bone dry at this point. It was thick enough to give some solidity, cheap enough to not worry about him trashing it at this point, and easy enough to work with.
The Bench Top
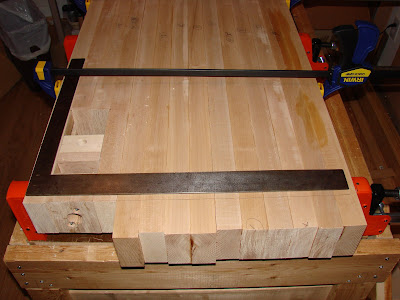
I started with the top. I jointed a couple of 2x6's and glued them together.

Nothing pretty, but solid enough. The boards were also a bit wanky. That's my technical term for slightly cupped, not flat, even a little wavy in places.
I could have flattened them individually before jointing them, but since they were so small, I decided to get them glued and then tackle them together as a single surface.
I first trimmed them to length.

Then I began with my old German scrub plane.

You can see the kinds of shavings I was getting. I didn't set it to be very aggressive because this pine will splinter like anything if you try.

After that, I began the diagonal traversing. You can see what happens when you have no camber on the blade and go across grain.

The last step was to plane down the grain with my #3 to smooth out the marks from the other planes. I also ended up taking some passes with one of my #6 planes as a kind of joiner plane before my #3 but it all seemed flat enough for my purposes so didn't spend much time before jumping right to the smoother.

And here is a little display of the different kinds of shavings that result from the different operations. I dug through my shaving pile and found, from left to right:

Scrub plane chips - Early traversing short shavings - Longer shavings from traversing - Thicker shavings along the grain to take down the high spots left from traversing - Final thinner shavings from smoothing.
The Base
The next time I was in the shop I began the base. Here I'm going back to my supply of dry, cheap construction lumber. I think 2x4's are sufficient for the legs. I figured just half-lap joints to affix the front and back cross pieces, made out of a scrap 1x4, and some simple through M&T joints for the end cross pieces. My design at this point is to mortise and tenon the base into the top so I figured to leave some wood above the half lap for this.
I decided to put the front and back cross pieces up just under the top because I wanted to leave the bottom as open as possible for him to stand, and the size of the bench and the lack of much clamping up at the top made this possible. I figured I can always flip the legs upside down as I get them built and put the cross member at the bottom if I decide to.
This is indicative of another aspect of this project I wanted to explore: improvisation. I'm working pretty rough and pretty imprecise. I'm using the material itself for measurements so I have no idea how big any of this is. If I were to take more care with this, as I certainly will for his next bench when he's old enough to actually do stuff, the proportions would have been different, and I would have taken care to shape and size the various components to look better together. As it is, I have a feeling it will look a bit odd once it's finished, but I'm looking to spend as little time making it while still having it be functional for its limited requirements.
So, I started cutting the legs.

Using one leg to indicate the size of the next

You can see the precise layout tools I'm using reflect the obsessive drive for perfection in this piece.

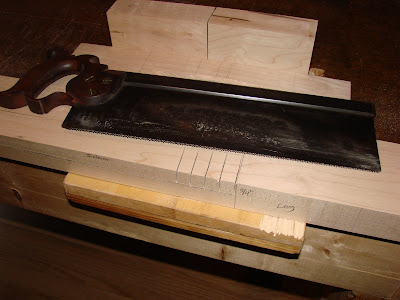
Using my bench hook I first trim

Then do a quick squaring off just using my bench hook as a quick-and-dirty shooting board rather than get out my dedicated one. This is part of my drive to do this as quickly as possible.

After getting the legs cut and squared, I figured out about how far apart they were by using a scrap of 2x4 as spacer. I need the legs far enough apart so that the bench is stable, but want to leave some room on the ends so I can do through through mortise and tenons to affix the base to the top.

At this point I started to touch up the surfaces of the legs. I don't need them perfect, just better than straight-from-the-borg 2x4. I'm shooting for "flat enough".

Here's a good indication of how the board itself told me I was flat enough. This wood has been in my shop for at least six years, some of it may very well be older. It has a kind of oxidation to the outside of it that is darker than the inside wood. The two pictures below show you what one board looks like as I start to flatten it. Notice in the first picture the contrasting lighter and darker areas. The lighter areas are the high spots, and the darker are the low spots after a pass or two. Once it all looks the same, as in the second picture, I know I'm done. Good enough.


I looked for a short piece of fairly narrow stock for the end cross pieces. I found this wanky piece of very soft wood. I'm not even sure where or when I picked it up. At first I thought it might be maple, but planing it was so easy and it was so soft that I suspect it's basswood. But good enough.

And now I have my material.

Cutting the joints
Layout was simple. I used the top as indicator of how far down I needed to take the half-lap joints I was going to use to join the front and back cross pieces to the legs. I left a little material on the ends assuming I'll trim it flush to the top.

I used the cross piece itself to figure out how wide to make it.

I used the material again to determine how far into the wood to cut. At this point I decided not to go with a half-lap but to take advantage of the thicker legs and just cut the full thickness into the leg. That's one less part of a joint to cut. Quick and dirty, but functional.

I cut to the lines and then started hacking it out with my chisel and mallet. You've got to be careful because this pine will splinter past your line if you just look at it funny.


I used my old router plane to sneak down to the final depth.

You can see the bottom of the cut is still not too pretty, but it got better with subsequent joints. I learned to stop hacking with the chisel sooner and cut with the router plane longer.
Voila! A couple of half-way decent joints for quick and dirty.


I have all four of these joints cut now. Next I will actually put them together and then work on the end pieces.