The general concept is an old one, and I first encountered it from first Chris Schwarz's blog over at Woodworking Magazine (see blog roll on left), and then again in his workbench book. (which you should buy, right now. Go ahead, I'll wait......Back again? good)
The details of execution I came up with myself. I didn't want to do a bench bottom installation, and I thought, since I was designing this from scratch, and could incorporate it any way I wanted, I'd design it to be built-in to the bench itself. This allowed me to keep the design very simple, which is a benefit for an amateur like me.
The essential design is a block of wood (the chop) attached to the end of a small bench screw. The screw is fixed at the end of the bench, and the chop slides along a pair of grooves cut into the faces of the adjoining boards.
My top is made up of a series of 7/8 thick boards glued together. Board 1 is at the front of the bench where I stand, and board 14 is at the back. Board 1 is full length. Board 2 and 3 are short, thus creating the gap for the wagon vise. Board 4 is full length. There is a groove cut into the inside faces of boards 1 and 4 down which the chop moves. At the end of boards 2 and 3 is a block through which the screw passes and into which I inset the nut of the screw. This block is just glued face-t0-face with boards 1 and 4.
Here's a bad copy of the Visio drawing I made of it.

Update: I realized the I forgot to point out that my original drawing had the vise only one board wide, but when I got past measurements, and got to the real objects, I realized that I needed to make it two-boards wide. You must always be ready to change design in the face of reality. At least those of us as bad at design as I am.
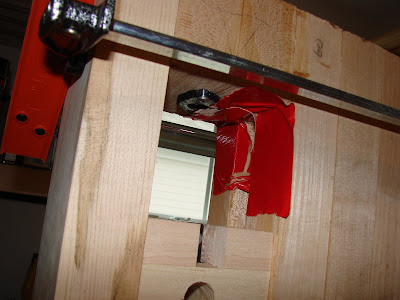
Here's a photo of it installed. You can see the groove and the tabs on the chop that slide in the groove. You'll notice that I made the chop so the grain went the opposite direction of the bench top. I did this because I had to laminate the chop together to encase the pad of the bench screw.
Perhaps this is a good time to revisit how I built it. (you can read my account at the time in an earlier post)
First the chop. I had to make this several times as I kept learning and screwing up the layout dimensions. I also started to go down the path of a half-dovetail design for the tabs and groove, but realized what a total pain that was going to be to cut in the hard maple. So I went with square, which works just fine.
First I cut out the three pieces and then ganged them together to cut the tabs.

Now, this is what the screw looks like.

It's a press screw for book presses or cider presses. The pad on the end has no built-in means of affixing it to a chop. I decided I didn't want to drill holes in it since I wasn't sure how all of this would work, and if I'd need to change the screw, and if the holes would weaken the already small pad. So I designed a means to encase the pad in the chop in such a way that i could take it out if necessary.
Here's the back-most layer of the chop. The keyhole shape is to allow the collar of the pad to stick through, and the slot in the bottom allows access to the bolt that holds the pad to the screw.

The middle layer of the chop I cut out a recess to accommodate the pad.

It was at about this point that I decided not to make the pad removable. I still needed access to the bolt to affix the pad to the screw, but I left the recess for the pad in the second layer just big enough for the pad. I then glued it all up.

Here it is all glued up and ready for mounting.

Here it is with the screw installed. The piece of scrap you see shows my initial thoughts on a half-dovetail design for the tabs.

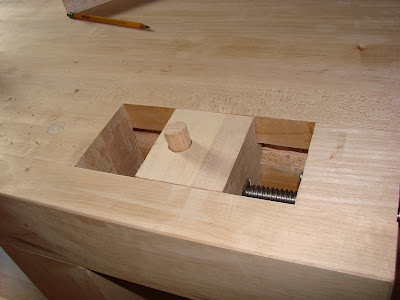
The dog hole in the chop goes towards the end.


After that, it was time for the grooves.
After careful layout, and a lot of trying out prototypes (both of the design, and the technique to make such big stopped grooves), I cut the grooves. The grooves are about 1" wide and about 1/2" deep. All I had was a 1/2" pigsticker mortise chisel, a great big mallet and ear protection.


Here you can see how the chop slides in the grooves.

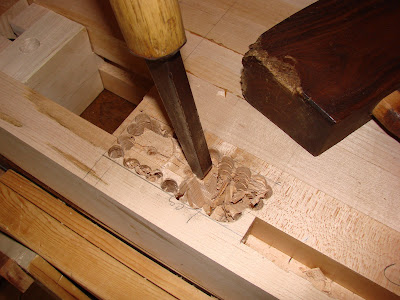
Making the block at the end that holds the nut for the screw was also a bit of a challenge, mainly because drilling out a large enough hole through end grain of hard maple is not a fun thing. I tried a bunch of different ways with what tools I had and ended up doing the e pluribus unum technique, "out of many holes, one" approach.


You'll notice the final hole is not exactly round, but not as distorted as it appears in the last picture. But it was good enough.
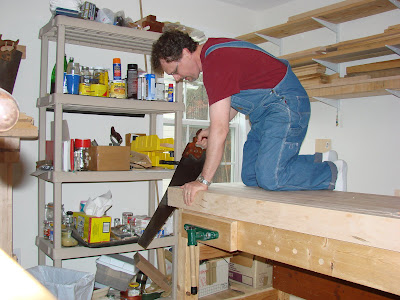
I tested it for length. (I learned, the hard way, to leave the boards all a little too long on one end and cut them off at the end rather than try and cut them all to perfect dimensions. There are no perfect dimensions)

And in the end, after gluing up, screwing up the glue-up and having to reglue (read back a bit in the blog for all the fun), I ended up with a great little wagon vise. It seems small, but it really holds quite well. I could pick up my bench, if I was strong enough, by a handle squeezed in my wagon vise. And I ended up using mainly wooden bench dogs made out of lengths of dowel with a little ball catch inset into the side to make sure the ill-fitting, cheap dowels don't end up on the floor too easily. I was afraid these wooden dogs wouldn't work, wouldn't hold, but even the soft, poplar-like ones from China just end up distorting a little bit to make a flat side, and hold like the dickens.


Even when I stick the dogs up high, it holds like a champ.


And for narrow stock, less than 3 1/4", I can clamp it directly and then nothing is moving when I do that.

I find that sometimes putting a wide piece of scrap in between the dog and the piece I'm working on helps to distribute the load and makes it clamp more securely.

Overall, I really like my wagon vise. It took a lot of fiddling to get it right, mainly because of my lack of skill or design sense, but once I figured out what I wanted to do, and how to do it, it was fairly straight forward. If I had a larger bench, I'd love to use one of the shorter shoulder vise screws used in European workbenches. It would be totally overkill, and would take up a fair amount of your bench, hence you'd need a big top for it to work, but it would be really cool.


And one more comment. When Chris Schwarz talked about his original wagon vise, he mentioned that he was concerned about all that force on just a small block at the end, so he put an end cap on his bench top. I decided to risk it, and I know it's still quite new, but so far it seems like it's doing just fine. It is about 12 square inches of face-to-face glue surface on each side, so that should be pretty strong. And it seems to be working.

Give it a shot on your own bench. Once you get the concept, it's not that difficult.
AAAndrew